
ExpoScreen Tutorials: an Interactive Presentation in an Hour
Seven short lessons with screenshots — from an empty project to a finished touch screen app. No code, no designers: upload your materials, build sections, tune the look and download the app.
Building and preview are free — learn on your own real project.
Start for freeStep-by-step guide
Lesson 1. Create a project
Sign up — it is free, no card required. After signing in you will see the list of your projects.
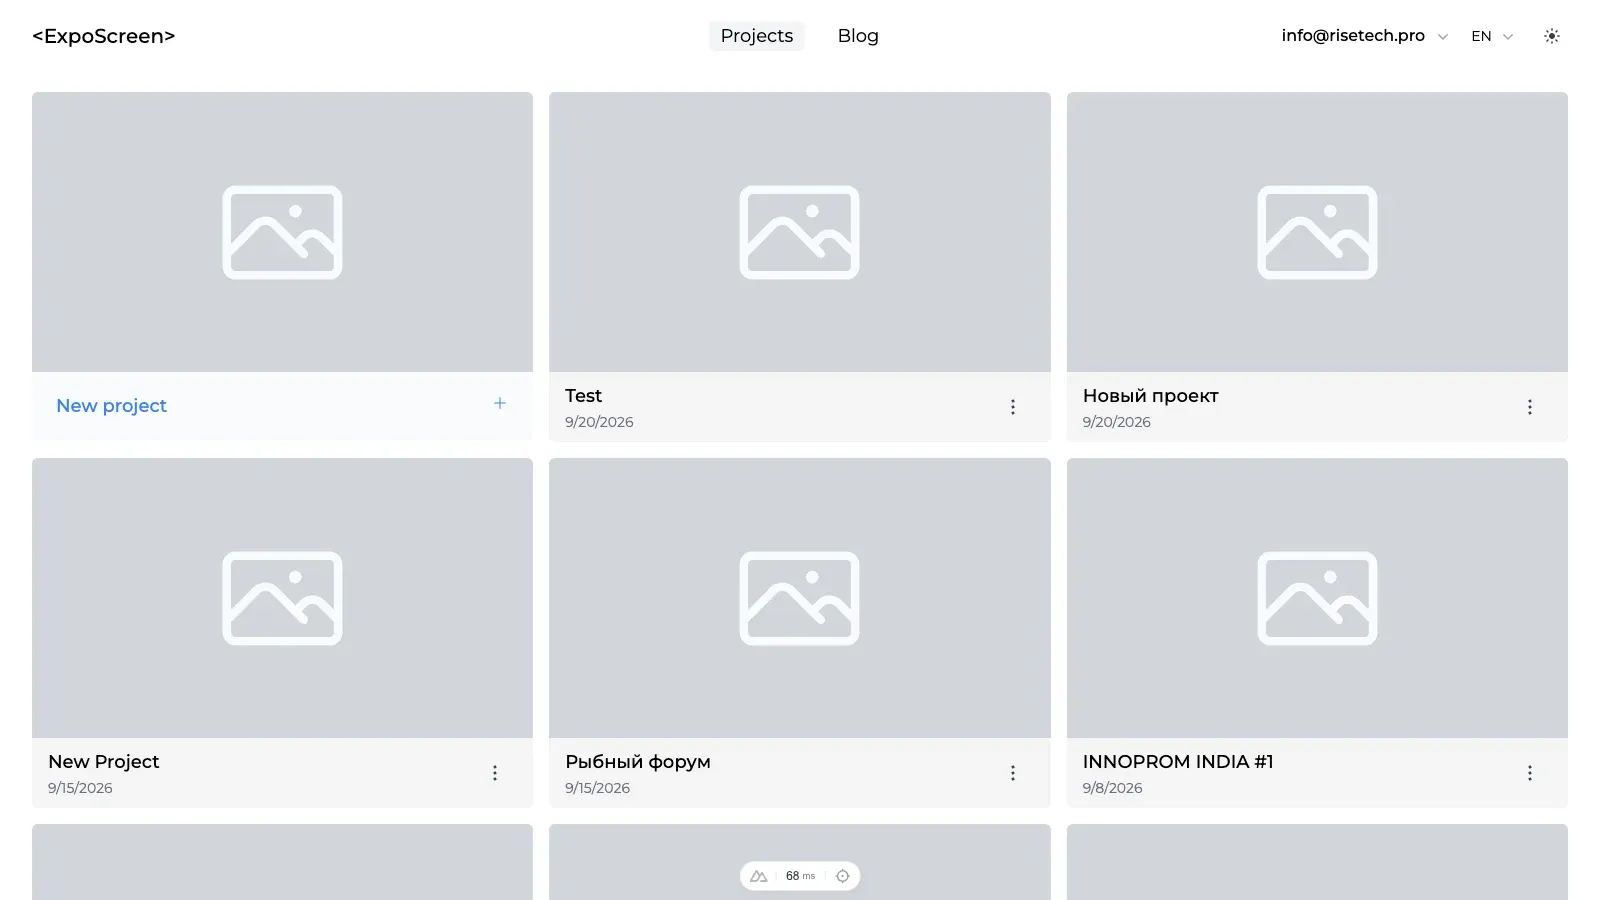
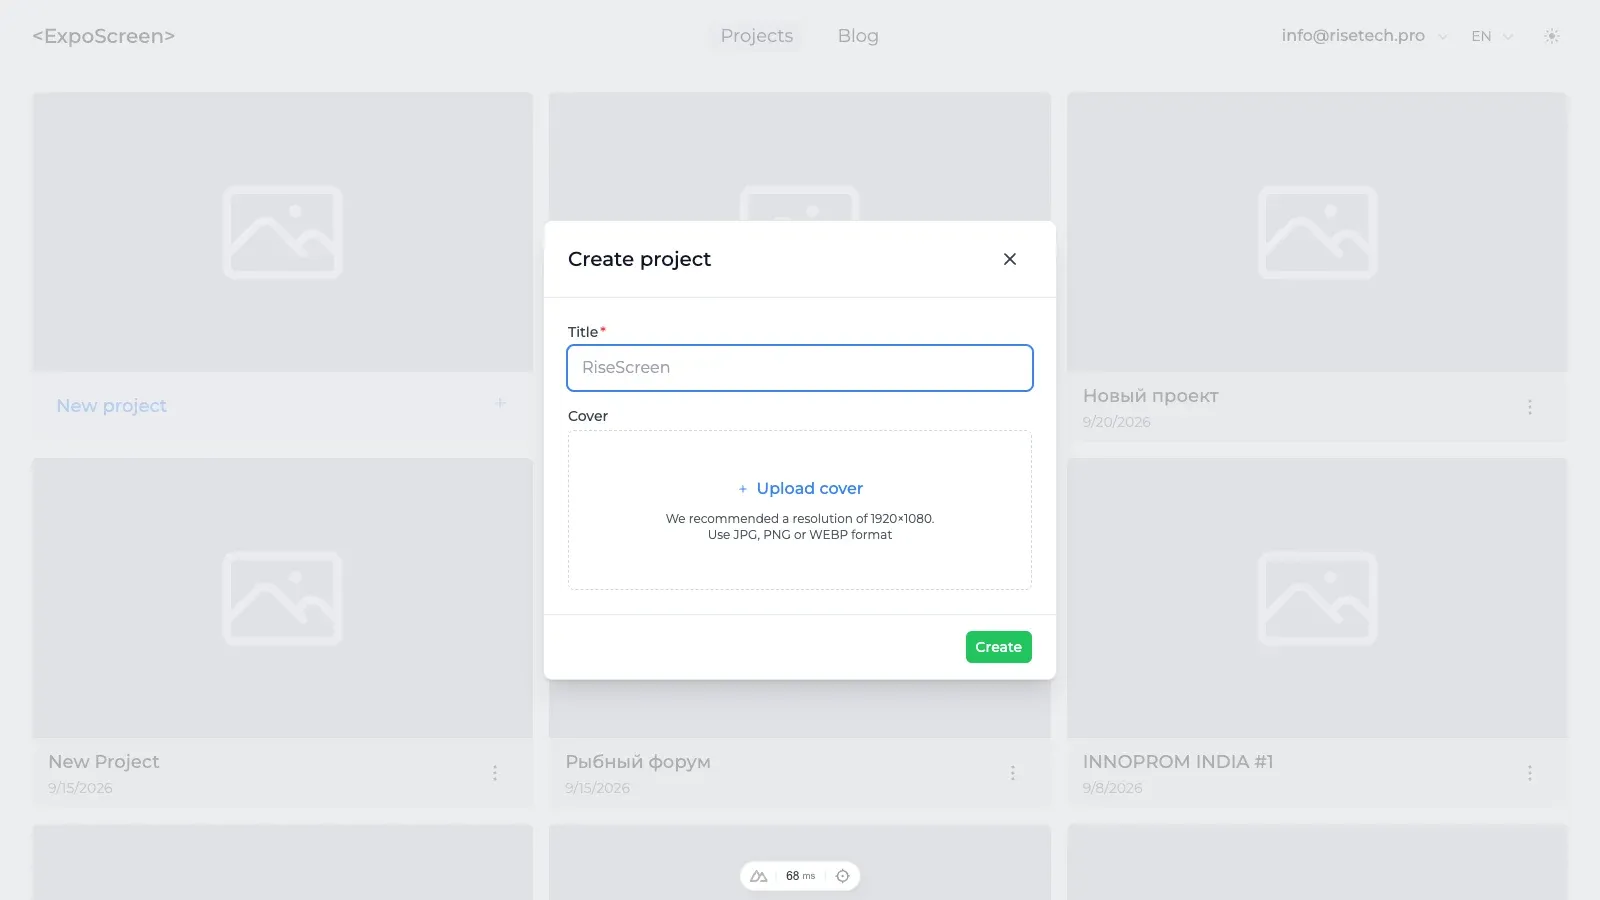
Click "New project", enter a title (for example, "CES 2027 booth") and optionally upload a cover — 1920×1080 in JPG, PNG or WEBP is recommended. Click "Create".
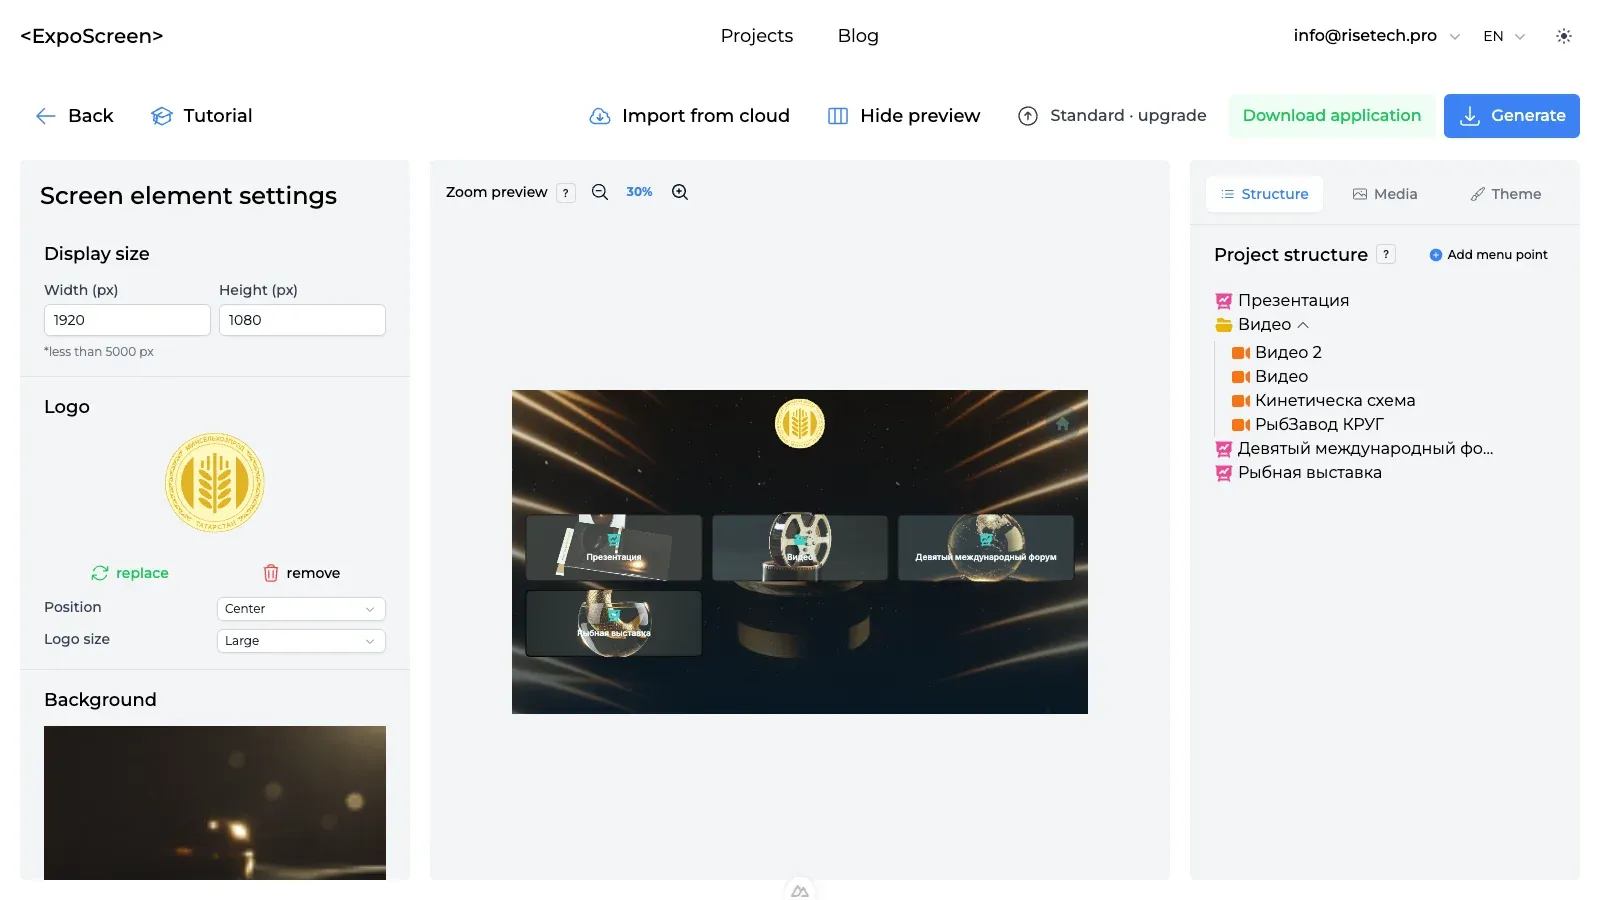
The editor opens with three panels: "Screen element settings" on the left (screen, logo, background, controls), the live preview in the center, and three tabs on the right: "Structure" (menu sections), "Media" (your files) and "Theme" (look and colors, including AI design).
Lesson 2. Upload your media
On the right open the "Media" tab and click "Add media files". In the "Create media item" dialog click "Upload files" — you can pick several files at once — and confirm with "Create".
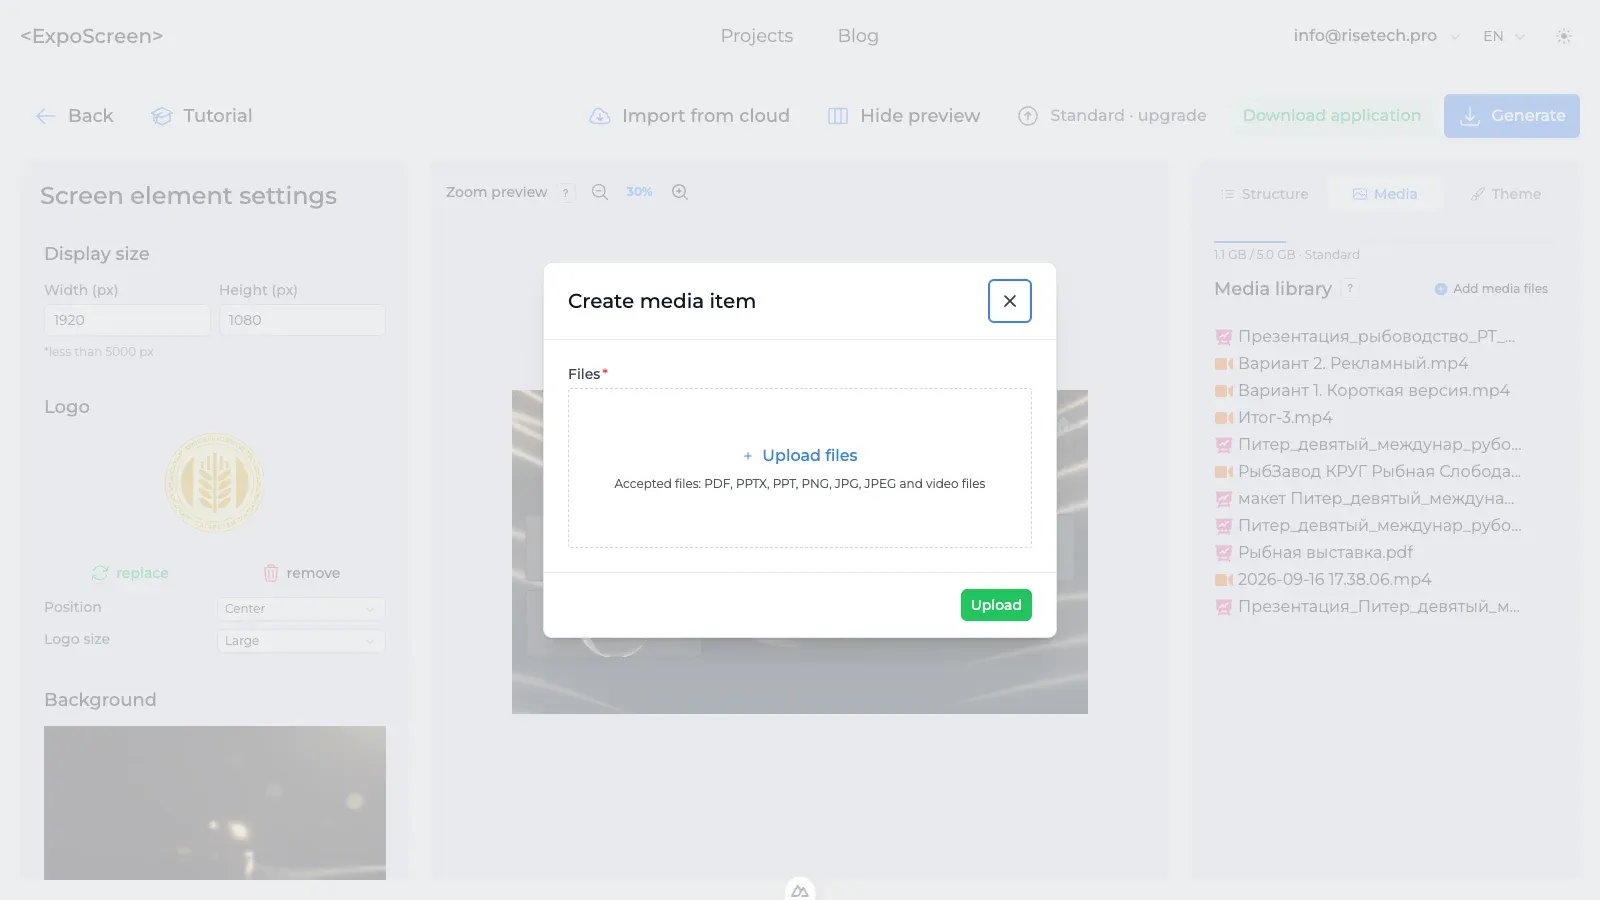
Accepted files: PDF, PPTX, PPT, PNG, JPG, JPEG and video. Upload slide decks as files — the slides become swipeable on the touch screen, no conversion needed.
Uploaded files appear in the media library list; reorder them by dragging. The media library size depends on the plan: 1GB before payment, 2GB on Lite, 5GB on Standard, 20GB on Pro — the counter sits above the list.
Lesson 3. Build the section structure
The most important lesson. A presentation is a tree: folder menus with content inside.
On the right open the "Structure" tab and click "Add menu point".
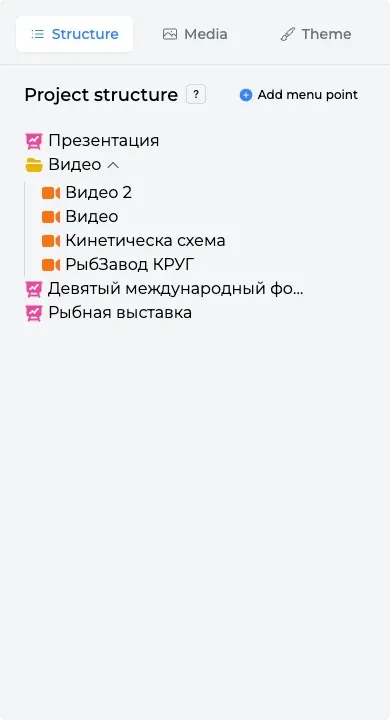
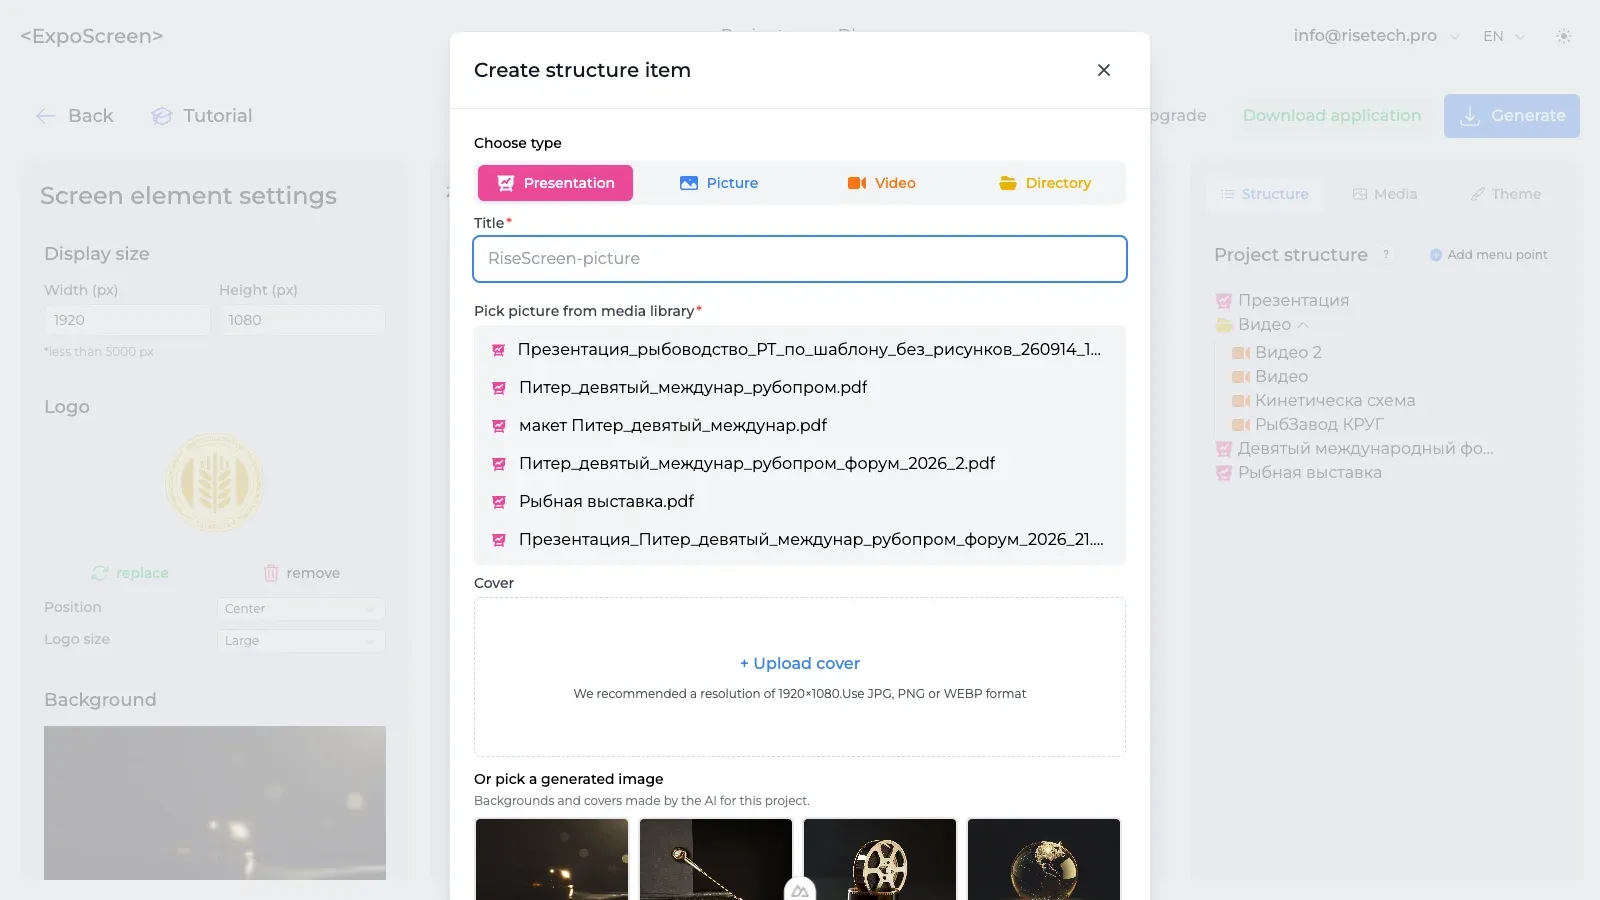
In the "Create structure item" dialog choose the type: "Presentation", "Picture", "Video" or "Directory". Enter a title, pick a file from the media library and optionally set a cover — that is what visitors see on the card. Upload it as a file or pick one of the images the AI generated for the project (see lesson 5).
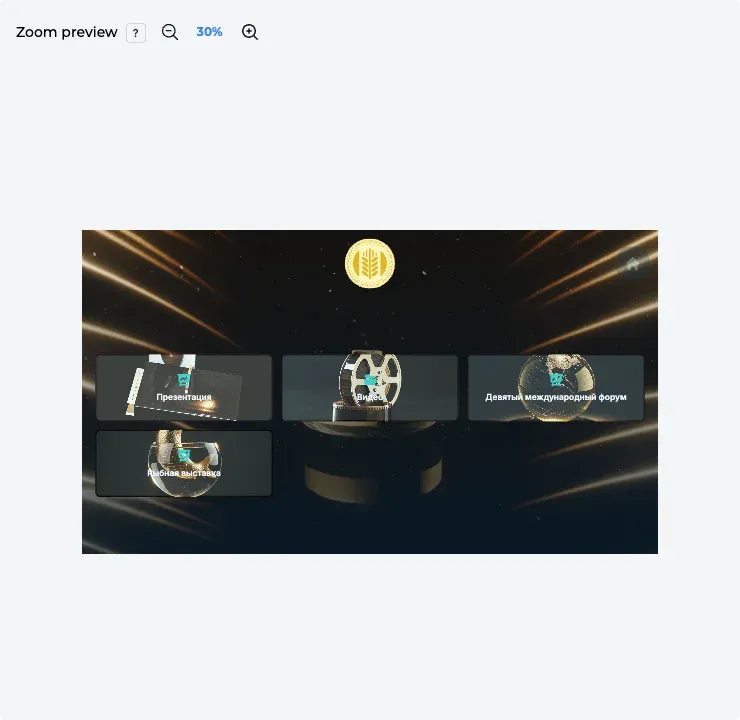
A "Directory" is a menu screen made of cards. A visitor taps a card and goes inside. Put content or nested directories inside (for example: "Products" → "Series A" → product cards). Change the order by dragging.
Every change shows instantly in the central preview. Zoom the preview with the "+" and "−" buttons or Shift + mouse wheel, and pan with Ctrl + drag.
Lesson 4. Customize the look
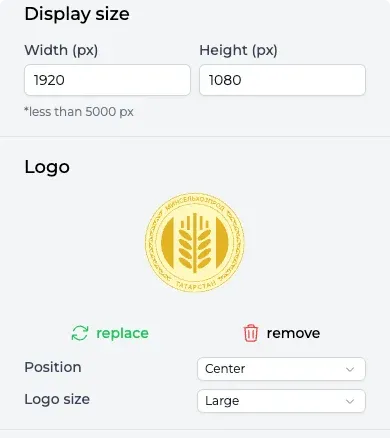
"Display size": enter the width and height of your screen in pixels (up to 5000 px) — for example, 1920×1080, or 1080×1920 for a portrait screen. "Logo": upload an image, choose its position (left, center, right) and size. The "Show logo" switch removes the logo and the project title from the start screen — for example, when the logo is already part of the background image.
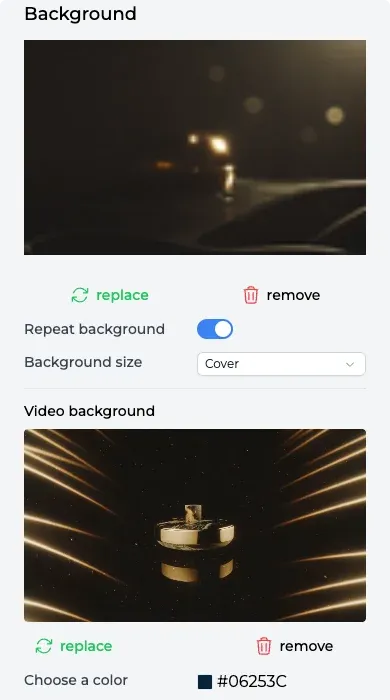
"Background": an image ("Select file"), a video background ("Select video") or just a color.
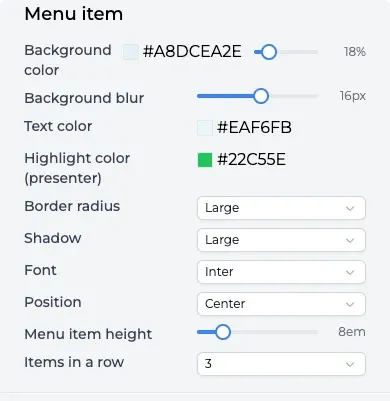
"Menu item": card background color and opacity, blur, text color, corner radius, shadow, font, position on screen, card height and cards per row (1–4).
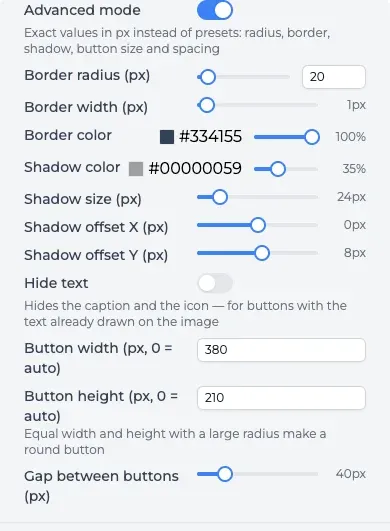
The "Advanced mode" switch in the same block opens exact pixel values instead of presets: a radius up to fully round buttons (equal width and height with a large radius), border width and color, shadow color, size and offset, a fixed button width and height and the gap between buttons. The "Hide text" switch removes the caption and the icon — for buttons whose text is already drawn on the cover image. The Figma import (lesson 5) fills in these same fields.
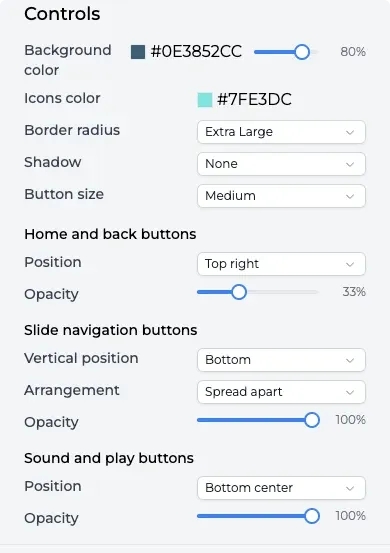
"Controls": button color and size, plus the position and opacity of the Home and Back buttons, slide navigation arrows and sound and play buttons — handy for portrait screens.
Lesson 5. Theme and AI design
The start screen can match your brand in a couple of minutes — by hand, with the AI or from a ready Figma mock-up.
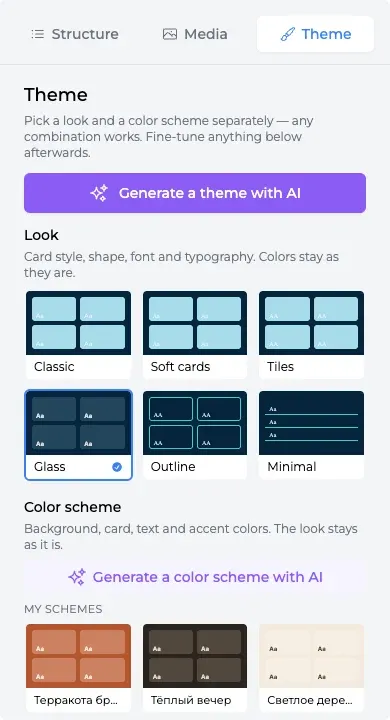
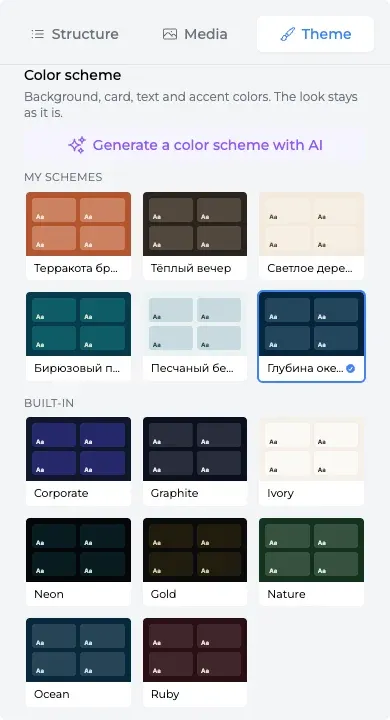
On the right open the "Theme" tab. In the "Look" gallery choose how the menu cards are drawn: classic, soft cards, photo tiles, glass, outline or minimal. In the "Color scheme" gallery — the background and the colors of cards, text, accent and controls. Any pair works and the thumbnails show the result in advance. Every parameter can be fine-tuned below.
The "Generate a color scheme with AI" button in the color scheme gallery: describe the brand and the mood — the AI adds three schemes to "My schemes", available in all your projects.
Click "Generate a theme with AI" and describe the stand in a couple of sentences, e.g. "premium dark style with gold accents for a jewellery brand". If the project has a logo, the AI reads the palette from it. Fifteen seconds later you get three theme variants — any of them applies with one click.
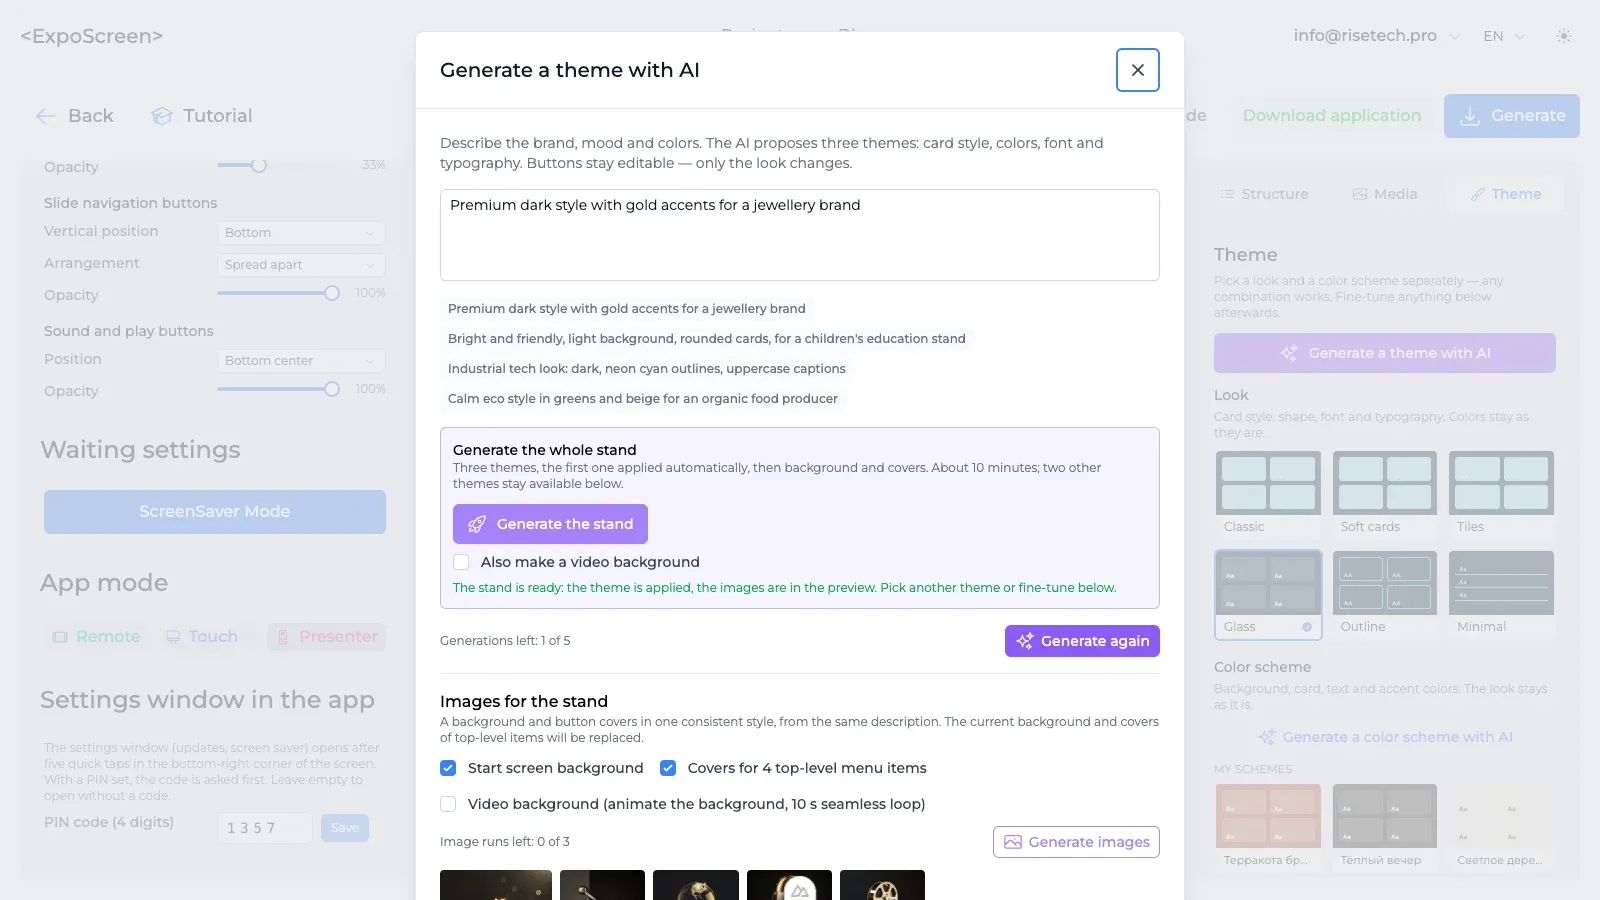
In the same dialog, "Images for the stand": from the description the AI draws a start screen background and covers for the menu items in one style, and the "Video background" checkbox turns the background into a seamless loop. "Generate the stand" does everything at once: theme, background, covers — about 10 minutes.
Already have a mock-up in Figma? Click "Build a theme from a Figma mock-up" and paste a link to the frame with the start screen (in Figma: Share → "Anyone with the link" → Copy link; the link must contain the node-id). The AI reads the layers, picks the colors, font, button shape, sizes and gaps, exports the background and image buttons, and shows the result next to the mock-up with notes on what was reproduced approximately. Nothing is applied until you click "Apply to the project". Grids of identical buttons on a background or photo transfer best; free-form layouts, animations and several screens in one frame cannot be reproduced by the engine — examples and limits are listed right in the dialog. An import uses one theme generation.
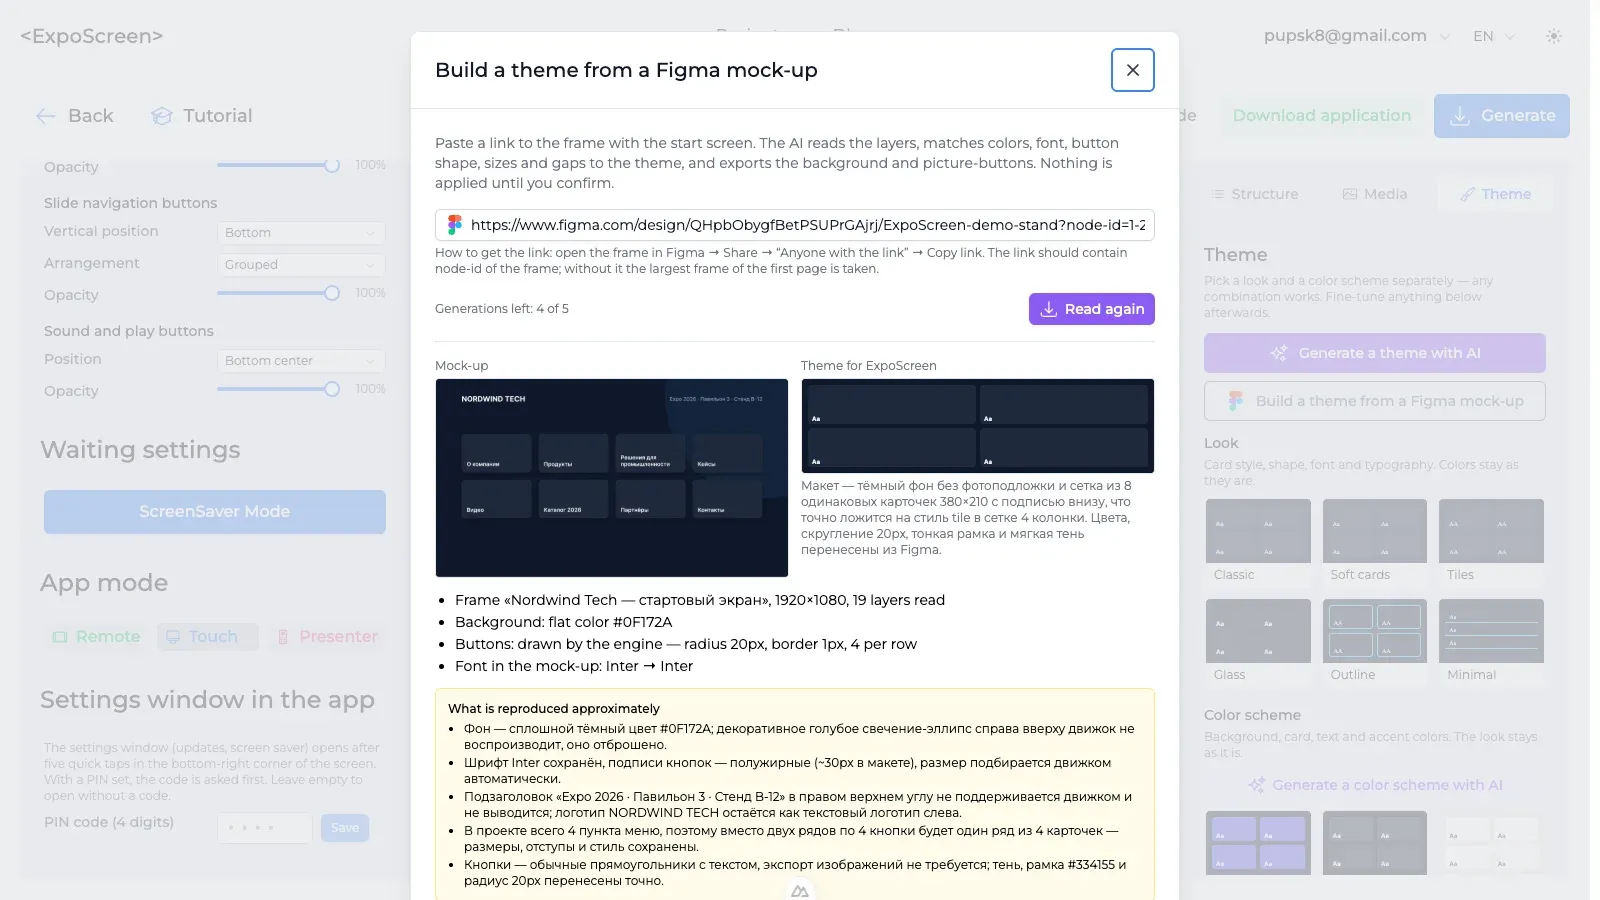
Generations are included in the plans: Lite — 1 theme and 1 image run, Standard — 5 and 3, Pro — 20 and 10. Before payment you get 2 theme generations and 1 image run to try it out.
Lesson 6. Screen saver, control mode and PIN
In the "Waiting settings" block click "ScreenSaver Mode".
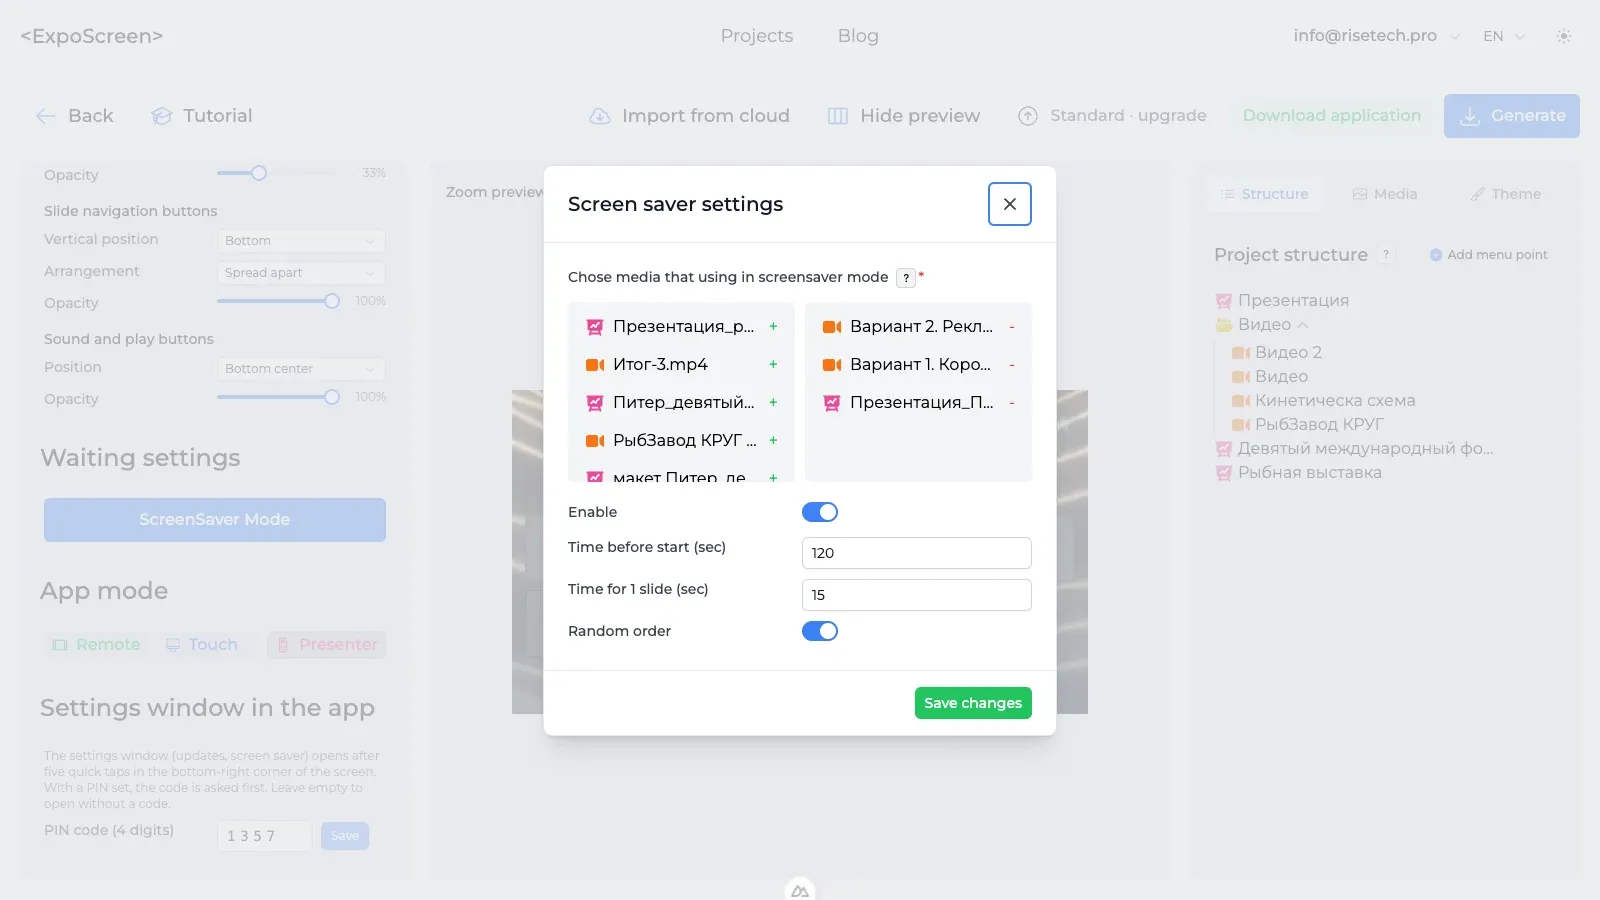
Pick the videos and images from the media library that will play while nobody is at the screen: available files on the left, selected ones on the right. Turn on "Enable", set the time before start and the time per slide, and optionally random order. Click "Save changes". A touch brings the visitor back to the menu.
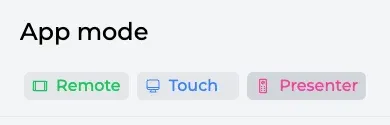
In the "App mode" block pick the control mode: Touch — visitors browse sections on the touch screen themselves; Remote — the presenter drives the big screen from a phone or tablet; Presenter — a regular clicker flips the slides.
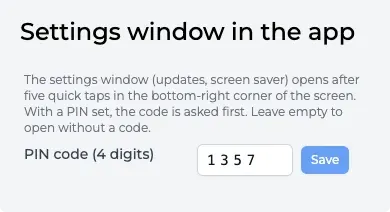
In the "Settings window in the app" block set a four-digit PIN. On the stand the settings window (content updates, screen saver) opens after five quick taps in the bottom-right corner of the screen, and with a PIN only after entering the code — visitors will not get into it.
Lesson 7. Download and run
Check the project in the preview — everything is free up to this point. The "Hide preview" and "Pay for project" buttons are above the editor on the right. To see it on a real screen before paying, click "Trial build": you get the same app with a semi-transparent ExpoScreen logo across the screen.

"Hide preview" expands the right column with the Structure, Media and Theme tabs to the full width — handy for large projects with dozens of sections.
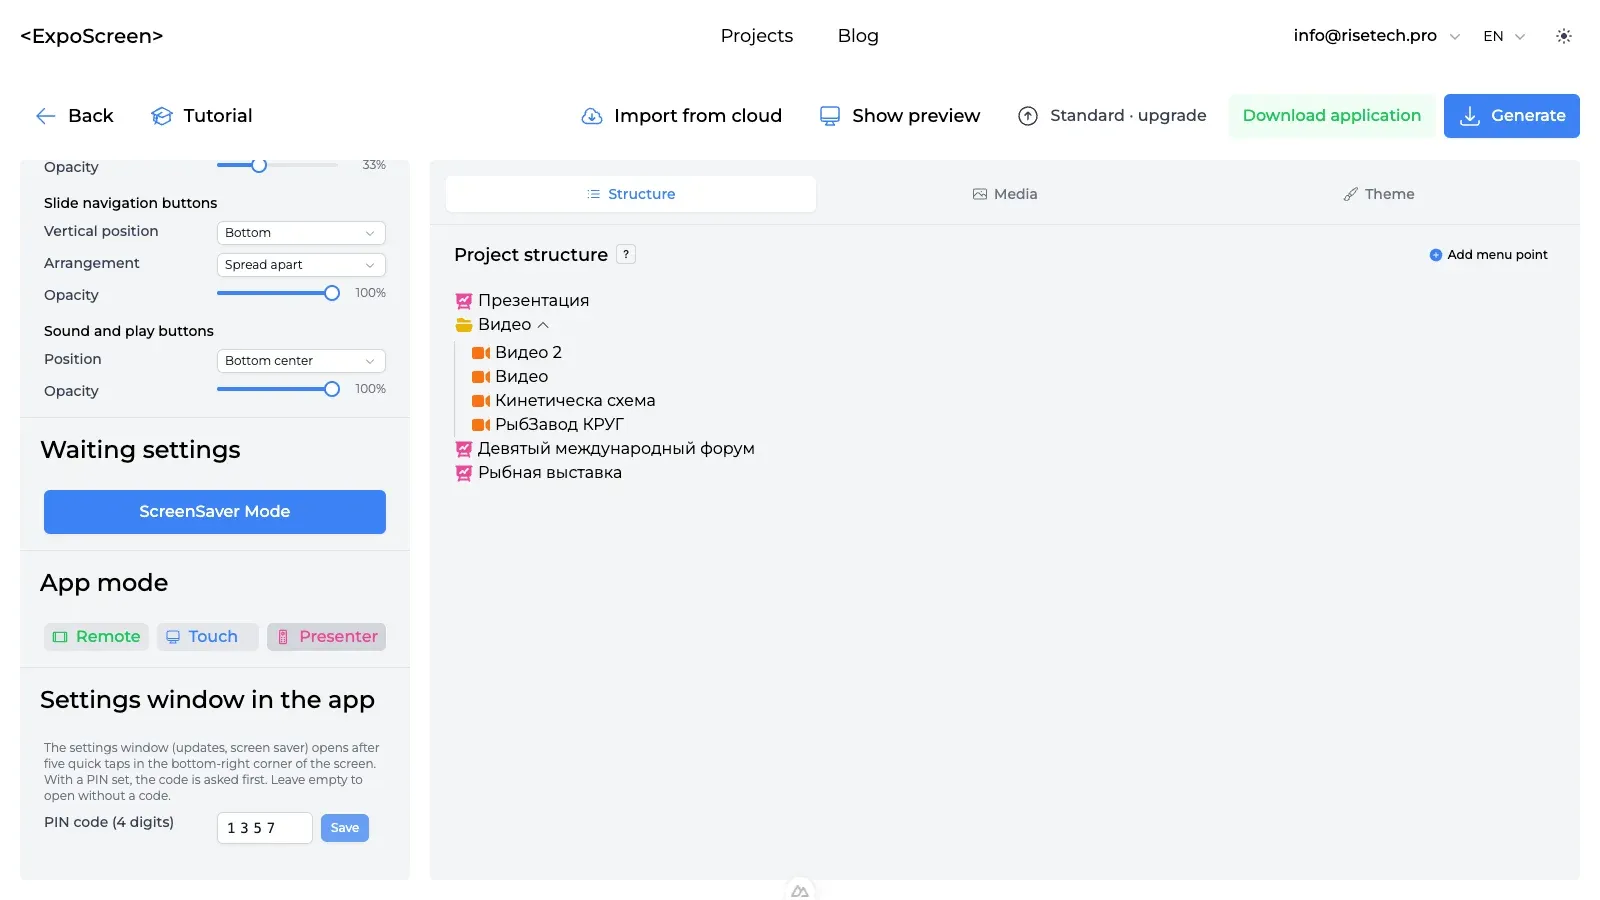
Click "Pay for project" and pick a plan: Lite ($79, touch mode, one platform), Standard ($199, all modes, Windows and macOS) or Pro ($499, for agencies). After payment the "Generate" button appears: click it, pick a platform — Windows or macOS — and start the build. When the build is ready, the "Download application" button becomes active.

Install the finished app on your touch screen device — step by step for Windows and macOS in the "Installing the app on a device" section below. No internet is needed at the venue — it runs fully offline.
Need a change? Update the content in your dashboard and rebuild the project for free — an update takes about 15 minutes.
Installing the app on a device
You have the archive — what next: extract it, run it, open the presentation. Nothing to install and no internet needed.
Windows
The project.zip archive contains an ExpoScreen folder: the ExpoScreen.exe program, a "project" folder with your media files and README.txt. Nothing to install — this folder is the app.
Download the archive with the "Download application" button on the project page and move it to the computer connected to the screen (a USB stick works — no internet needed).
Extract the archive completely: right-click → "Extract All". The program cannot run from inside the zip. You can move the ExpoScreen folder wherever you like — for example, to drive D: or the desktop — as long as the "project" folder stays next to ExpoScreen.exe.
Open the ExpoScreen folder and run ExpoScreen.exe — the file with the ExpoScreen icon. The app is not code-signed yet, so Windows may show "Windows protected your PC" — click "More info" → "Run anyway". No administrator rights are needed.
The presentation opens full screen. Desktop shortcut: right-click ExpoScreen.exe → "Send to" → "Desktop (create shortcut)" (on Windows 11, click "Show more options" first).
macOS
The project.zip archive contains an ExpoScreen folder: the ExpoScreen.app application, a "project" folder with media files, the "Запустить.command" launch script and a read-me file. Nothing to install — this folder is the app.
Download the archive with the "Download application" button and extract it with a double click. You can move the ExpoScreen folder wherever you like, for example to Documents, as long as the "project" folder stays next to ExpoScreen.app.
First launch: right-click "Запустить.command" → "Open" → "Open" again. A plain double click is blocked by macOS because the script is not signed.
The script lifts the macOS quarantine from the folder and opens the presentation full screen. You can close the Terminal window afterwards.
From then on, launch ExpoScreen.app with a normal double click. If the app says it cannot find the project data, run "Запустить.command" again.
Presenter and remote modes
The mode is chosen in the editor, «App mode» block. Installation is the same as above; only the control differs.
Presenter — a big screen and a clicker. A 4-button clicker: ◀ ▶ pick a menu item and flip slides, bottom right opens the item (pauses a video), bottom left goes back to the menu and one level up. A keyboard works too: PageUp/PageDown, F5 or Esc, B. On first launch Windows asks about network access — presenter does not need it, click "Cancel".
Remote — the presenter drives the big screen from a phone or tablet. On first launch click "Allow" in the Windows Firewall prompt (administrator rights are needed). Then tap the bottom-right corner of the screen five times quickly — the settings window shows a remote block with a QR code. Point the phone or tablet camera at it: the remote opens in the browser, no app to install. The phone and the stand computer must be on the same Wi‑Fi.
Running at the venue and updating content
The app opens full screen in kiosk mode and works fully offline. To exit: Alt + F4 on Windows, Cmd + Q on macOS.
To start the presentation automatically when the computer boots, add ExpoScreen to startup: on Windows — Win + R → shell:startup → drag the ExpoScreen shortcut there; on macOS — System Settings → General → Login Items → "+" → ExpoScreen.app. If you later move the ExpoScreen folder, create the shortcut and the login item again.
Changed the content in your dashboard? No need to rebuild or download again: in the app tap the bottom-right corner of the screen five times quickly (the button is invisible), enter the PIN if one is set in the project, then "Download updates" → "Restart now". Updating needs internet; the rest of the time the app does not.
One app can run on any number of devices — copy the ExpoScreen folder or the same archive to each of them. One computer can hold several projects in separate folders without them interfering.
Removal: delete the ExpoScreen folder (on macOS, move it to the Trash). If ExpoScreen was previously installed with the installer, remove the old version as usual: on Windows — Settings → Apps → ExpoScreen, on macOS — from Applications.
Beginner questions
How long does the first presentation take?
About an hour: half for uploading media and building the structure, half for the design. Later updates take 15 minutes.
Do I need design or coding skills?
No. You upload ready-made materials and tune the look with sliders and a color picker — no code or designers involved.
What if all I have is a PowerPoint deck?
Just upload the PPTX, PPT or PDF file to the media library — the slides become swipeable on the touch screen, no conversion needed.
Can I try before paying?
Yes. Building and previewing are completely free, and the "Trial build" button gives you the app with an ExpoScreen watermark to test on your own screen. Payment removes the watermark: click "Download updates" in the app or build it again.
Try it on your own material
The best way to learn is to build your first project with these lessons. It is free — and if you get stuck, write to us and we will help.