

How to Show a PowerPoint or PDF on a Touch Screen — Offline, at a Trade Show or Showroom
Short answer: there are three practical ways to show a PowerPoint on a touch screen without internet. Run PowerPoint itself in kiosk mode on the computer that drives the screen; export the deck to PDF and open it in a full-screen PDF viewer; or use dedicated touch screen presentation software that turns the slides into a swipeable, self-running app with a menu. The first two are free if you already own the software, but visitors get no menu, no videos and no automatic return to the start screen. The third costs money — ExpoScreen, our own tool, is $79 to $199 one-time per project — and is built for unattended screens.
This guide covers all three honestly, then walks through the ExpoScreen way step by step. It is written for marketers and event teams preparing a trade show booth, a showroom or a lobby screen, usually a week or two before the event.
Last updated: September 28, 2026.
What you need before you start
- A touch screen driven by Windows or macOS. Large touch panels, kiosks, all-in-one PCs and touch tables almost always run Windows; some showrooms put a Mac mini behind the display. A TV with a touch overlay works the same way.
- The computer, not the screen, decides what you can run. PowerPoint, a PDF viewer or a presentation app is installed on that computer; the panel only shows it and passes touches through.
- A tablet is a different case. An iPad or Android tablet can play slides in the PowerPoint or PDF app, but it cannot run the Windows and macOS software described below, and it is small for a booth. In ExpoScreen a tablet is used as a remote control for the big screen, not as the screen itself.
- Your files: the PPTX, PPT or PDF, plus any videos as separate files (MP4 is the easiest; other formats are converted on upload).
Option 1. PowerPoint kiosk mode ("Browsed at a kiosk")
PowerPoint has a built-in kiosk mode. It shows the deck full screen, loops it, and disables the normal controls so that a visitor cannot accidentally close the show. Setting it up takes a few minutes:
- Open the deck on the computer that drives the touch screen. Go to Slide Show → Set Up Slide Show and choose "Browsed at a kiosk (full screen)". The show loops until someone presses Esc.
- Put the navigation on the slides themselves: Insert → Shapes → Action Buttons, or hyperlinks that jump to other slides. In kiosk mode this is the only way a visitor can move around.
- If the deck should run on its own, set automatic timings (Transitions → After) on every slide so it loops without touching.
- Save as a PowerPoint Show (.ppsx) so the file opens straight into the slideshow, and put a shortcut into the Startup folder if the kiosk should launch it on boot.
Where kiosk mode stops working
- Tap-to-advance and swiping are disabled in kiosk mode. Only the action buttons and hyperlinks you added work — without them the deck is stuck on slide one.
- A licensed copy of PowerPoint has to be installed on the kiosk computer.
- One file is one linear show. A menu of several catalogs, or videos from other files, has to be built by hand as slides with hyperlinks.
- There is no idle reset. If a visitor walks away on slide 40, the next visitor starts on slide 40 unless you added timings that loop back.
- PowerPoint does not lock the operating system. Esc leaves the show, and locking a PC to a single app is a separate setup (Assigned Access on Windows Pro and higher, or third-party kiosk software).
Verdict: fine for a single self-running loop, or for a carefully tested deck with a few linked sections. Painful for a booth that needs a product catalog, several decks and videos side by side.
Option 2. Export to PDF and use a full-screen PDF viewer
Export the deck (File → Export → PDF) and open it on the kiosk in a PDF viewer with a full-screen mode — Adobe Acrobat Reader (Ctrl + L), the PDF viewer built into Microsoft Edge, or Preview on macOS. A tap or an arrow key moves to the next page, and on a touch screen that is enough for one brochure or one price list.
- No menu: one PDF is one brochure. Several documents mean several windows to switch between.
- No video. Animations, transitions and embedded videos are gone the moment you export to PDF.
- No idle return to the first page, and the viewer's toolbar and the operating system stay reachable to visitors.
Verdict: the quickest free fallback for a single document, and the safest way to keep fonts and layout intact. Not a booth presentation.
Option 3. Dedicated touch screen presentation software
This is what the software category exists for. A dedicated tool takes your slides, PDFs and videos and produces an app that runs full screen, has a menu, plays videos, returns to a screen saver when nobody touches it, and works with no internet at the venue. The differences between tools are mostly about how much you can build and how you pay.
- Intuiface and PandaSuite are full no-code app builders with logic and integrations. Powerful, but subscription-based — Intuiface licenses every device, PandaSuite bills publishing per app — and a full app takes longer to build than a presentation. See our Intuiface alternatives comparison .
- Omnitapps4 is a Windows suite of ready-made touch apps and games (€645 one-time). You configure prebuilt apps rather than build your own structure.
- ExpoScreen (that's us) is built specifically for this job: PPTX, PDF, videos and photos go into a nested menu, and the result is an offline Windows or macOS app for $79 to $199 one-time per project. Building and previewing is free. The rest of this guide shows how.
The ExpoScreen way: from a PPTX to an offline touch screen app
Eight steps, about an hour for a first project. Everything before the download is free, so you can test it on your real deck.
Step 1. Create a free project
Sign up — no card required — and click "New project". Give it a title (for example, "ISE 2027 booth") and optionally a cover. Everything up to the download is free, so you can test the whole flow on your real deck.
Step 2. Upload the PowerPoint or PDF
Open the "Media" tab, click "Add media files" and upload the PPTX, PPT or PDF — along with videos and photos if you have them. Accepted formats: PDF, PPTX, PPT, PNG, JPG and video.
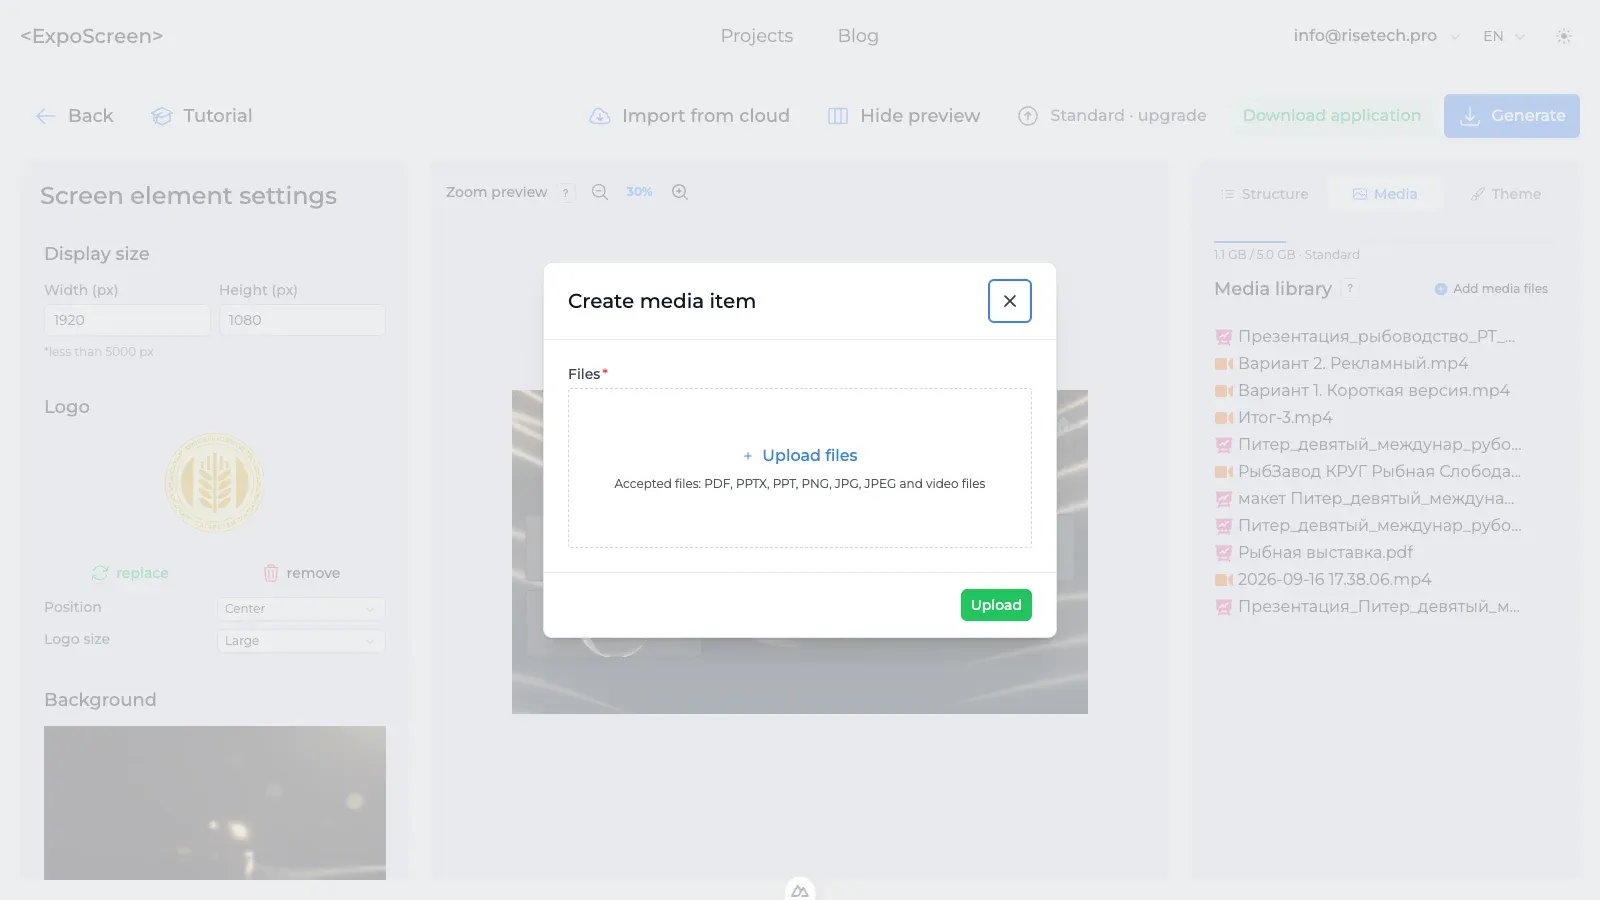
Conversion runs in the background. PowerPoint files are rendered by a conversion service that uses real PowerPoint, so fonts and layout stay intact and hidden slides are skipped; PDFs are rendered page by page. Each slide becomes a full-resolution image sized to your screen width. Animations, transitions and videos embedded in slides are not preserved — upload videos as separate files.
The media library holds 1 GB before payment, then 2 GB on Lite, 5 GB on Standard and 20 GB on Pro.
Step 3. Build the menu
Open the "Structure" tab and click "Add menu point". Choose the type — "Directory" (a menu screen of cards), "Presentation" (your deck or PDF), "Video" or "Picture" — pick the file from the media library and set a cover image for the card.
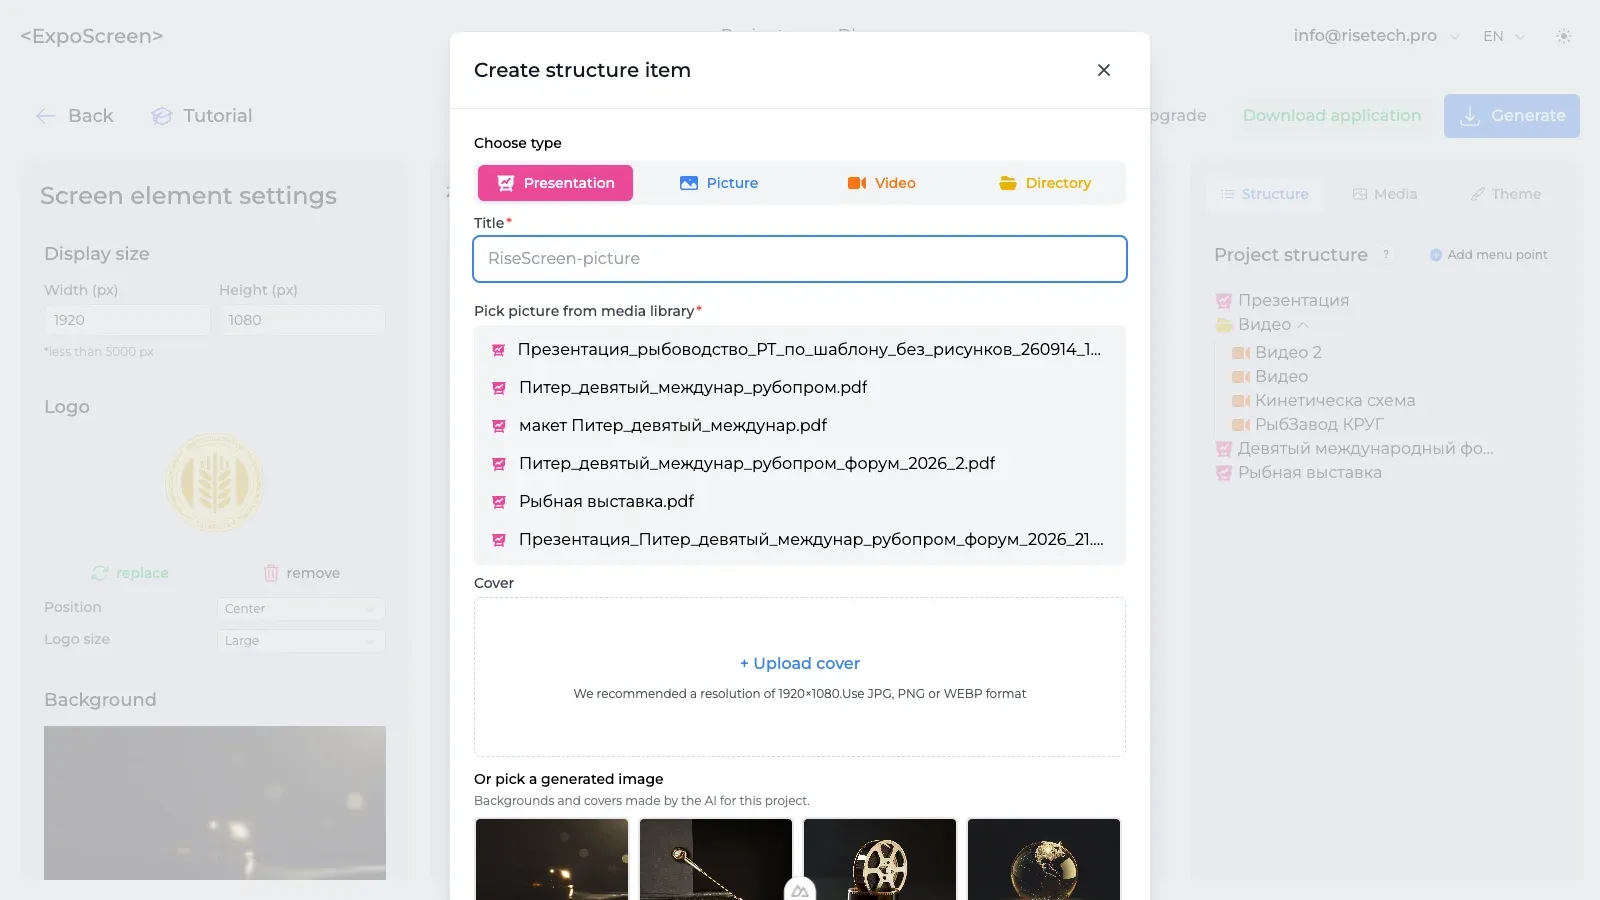
Nest directories as deep as you need: "Products" → "Series A" → one card per product. Visitors tap a card, swipe through the slides and use the Home and Back buttons, which appear on every screen automatically.
Step 4. Fit it to the screen
In "Display size" enter the resolution of your panel — 1920×1080, or 1080×1920 for a portrait kiosk (up to 5000 px). Upload a logo, set a background image, video or color, and pick a look and color scheme in the "Theme" tab. For portrait screens, move and resize the Home, Back and arrow buttons in "Controls".
Step 5. Choose the control mode and idle behavior
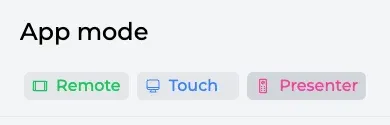
In "App mode" pick how the screen is driven: Touch — visitors browse on the touch screen themselves; Remote — a presenter switches content from a phone or tablet; Presenter — a regular clicker flips the slides.
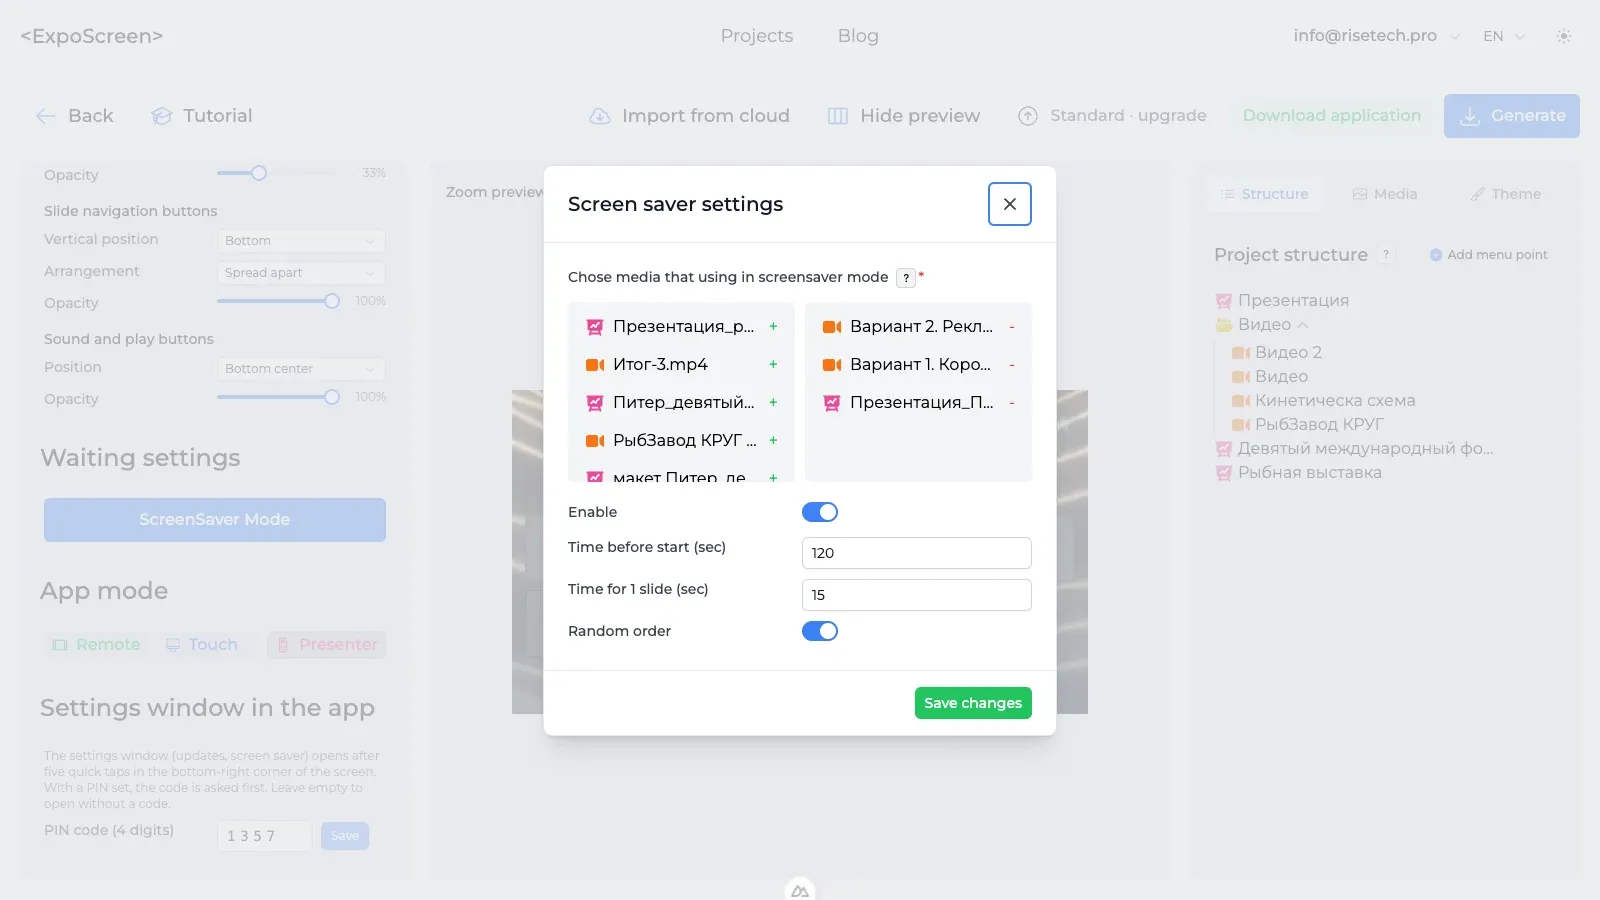
Turn on the screen saver (Standard and Pro): choose the videos and images that play while nobody is at the screen and the time before it starts. A touch brings the menu back, so every visitor starts from the beginning. Set a four-digit PIN so visitors cannot open the app's settings window.
Step 6. Preview, pay, download
Check the result in the preview in the center of the editor. When it is ready, click "Pay for project" and choose a plan: Lite $79, Standard $199 or Pro $499 — once per project, no subscription. Then click "Generate", pick Windows or macOS, and download project.zip when the build is ready.

Step 7. Install on the kiosk
Windows: copy the archive to the kiosk PC (a USB stick is fine — no internet needed), right-click → "Extract All", and run Exposcreen-Setup.exe from the extracted folder. The app is not code-signed yet, so if Windows shows "Windows protected your PC", click "More info" → "Run anyway". The installer copies your media and starts the presentation full screen.
macOS: extract the archive, right-click "Установить.command" → "Open" (the script copies ExpoScreen.app to Applications together with your media), then launch ExpoScreen. If macOS blocks the first launch, use System Settings → Privacy & Security → "Open Anyway".
To start the presentation when the computer boots, add the ExpoScreen shortcut to the Startup folder (Win + R → shell:startup) or to Login Items on macOS. The app runs full screen in kiosk mode; to exit, press Alt + F4 on Windows or Cmd + Q on macOS.
Step 8. Update the content before the next show
Replace the deck or reorder the menu in the browser editor. On the kiosk, tap the bottom-right corner of the screen five times, enter the PIN, and choose "Download updates" → "Restart now". This is the only moment the kiosk needs internet. Updates are unlimited on Standard and Pro, and included for 30 days after payment on Lite.
PowerPoint kiosk mode vs PDF viewer vs ExpoScreen
| PowerPoint kiosk mode | PDF viewer | ExpoScreen | |
|---|---|---|---|
| Swipe or tap through slides on the touch screen | Only via action buttons you add | Yes | Yes |
| Menu of several decks, catalogs and galleries | Build it by hand with hyperlinks | No — one file per window | Yes, nested folders with cover cards |
| Videos | Embedded in slides | No | Separate items, full screen, plus the screen saver |
| Back to the start when a visitor leaves | Only with a timed loop | No | Screen saver after inactivity, Home on every screen |
| Works offline | Yes | Yes | Yes — installed app |
| Locked to full screen | No — Esc leaves the show | No | Yes — kiosk full screen, exit with Alt + F4 or Cmd + Q |
| Software needed on the kiosk | A licensed PowerPoint | A PDF viewer | The generated app |
| Cost | Your Office license | Free | $79, $199 or $499 once per project; building is free |
PowerPoint on a touch screen: common questions
Can you run a PowerPoint on a touch screen?
Yes. PowerPoint runs on any Windows or macOS computer connected to a touch screen. In a normal slideshow a tap advances the slide. In kiosk mode (Slide Show → Set Up Slide Show → "Browsed at a kiosk") taps and swipes are disabled and visitors can only use the action buttons and hyperlinks you place on the slides.
Do I need internet to show a PowerPoint or PDF on a kiosk?
No, as long as the file and the software are on the kiosk computer: PowerPoint, a PDF viewer or an installed presentation app all work offline. Browser tools such as PowerPoint for the web or Google Slides need a connection. The ExpoScreen app is installed on the device and runs fully offline; internet is only needed to download the project and, later, content updates.
What happens to animations, transitions and embedded videos when I upload a PPTX to ExpoScreen?
Each slide is rendered as a static image by a conversion service that uses real PowerPoint, so fonts and layout stay intact and hidden slides are skipped. Animations and transitions are dropped, and an embedded video is shown as its poster frame, not played. Upload videos as separate files: they play full screen from the menu or in the screen saver.
Can I show several PowerPoints and PDFs on one touch screen?
Yes. In ExpoScreen every deck or PDF becomes a section in a menu, and sections can be nested in folders — Products → Series → Model. Visitors tap a card to open it, swipe through the slides and use Home or Back to return. Videos and image galleries sit in the same menu.
How do visitors get back to the start screen?
Every screen has Home and Back buttons, and after a period of inactivity the app shows the screen saver — your videos or images — so the next visitor's first touch always starts from the beginning.
What does it cost to put a PowerPoint on a touch screen with ExpoScreen?
Building and previewing is free. When the presentation is ready you pay once per project: Lite $79 (touch mode, one platform, 2 GB of media, updates for 30 days), Standard $199 (touch, remote and clicker modes, Windows and macOS, 5 GB, unlimited updates, screen saver, install on any number of devices) or Pro $499 for agencies (5 projects a year, 20 GB). No subscription.
Related pages
Pricing
One price per project. Install the finished app on any number of screens.
Try it for free and pay only if you like the result
Lite
One screen, one event
per project, one-time
Start free- Touch mode
- Windows or macOS — one platform
- Media library up to 2 GB
- Content updates for 30 days after payment
- AI design: 1 theme generation, 1 image run
- "Made with ExpoScreen" badge on the idle screen
One-time payment — the app works forever.
Standard
Most chosenA stand with several screens
Launch discount 30% until October 31
Start free- Touch, remote and clicker modes
- Windows and macOS
- Media library up to 5 GB
- Unlimited content updates
- Screen saver and cloud import
- AI design: 5 theme generations, 3 image runs
- Install on any number of devices
One-time payment — the app works forever.
Pro
Agencies and regular exhibitors
per project, one-time
Start free- Everything in Standard
- 5 projects (brands) per year, then $79 each
- Media library up to 20 GB
- Project templates
- AI design: 20 theme generations, 10 image runs
- Priority conversion and builds
- Telegram chat support
One project = one exhibitor. Pro covers five.
Building and previewing is free on every plan; up to 1 GB of media for unpaid projects. Pay when the presentation is ready for the event. Upgrading later costs the difference.
Try it on your own deck
Upload the PowerPoint you already have, build the menu and see it in the preview — for free. You pay only when the presentation is ready for the event.
Start free